Update: we will be working on both the issue of the fixed seat and the issue of transfer from wheelchair to shell.
Amy was still sick today and I didn't feel comfortable starting a new project regarding transfer without talking to her, so I worked on the erg chair project that we decided on when we visited CRI last week.
Basically, the rowers at CRI have this set-up for their ergs:
But they found that this sets the seat too high up for rowers to get the best draw angle--the height makes it so that they have to use a completely different set of muscles. The seat needed to be lower, which is why they had it upside down when we first visited them:
So the goal for today was to figure out how to adapt their existing hardware to be lower. CRI lent us a set of the connective parts of the erg and I started out the day by disconnecting the spacer
from the connective plates, screws, and bolts.
 |
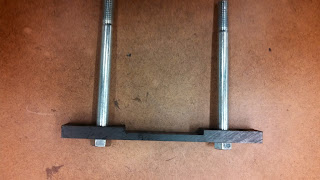
| This is what I ended up with. |
At this point, I was a little bit confused about how the connective pieces actually attached to the seat itself and thought that I would have to build a spacer between the connective plate and the seat to allow room for the bolts.
I wasn't quite sure how to do this, however, so I decided to take some measurements and look more closely at pictures of the entire adaptive seat and connectors. I saw that the seat connects to the connective plate by having bolts or screws go through another plate.
So I figured that we will be able to just put the bolts through both plates, an idea that I will be testing when we go to CRI again on Friday.
 |
| Prototype #1 |
Things we should think about next (erg chair):
- Does this design function correctly and solve the height problem?
- Using this design, how quickly can an erg be changed from sliding to fixed?
- How can this transformation process be speeded up?
- Is there a different way of connecting the seat to the erg that does not include screw clamps, which take a relatively long time to screw in? Is this new way sufficiently strong to hold the seat securely onto the erg while taking the abuse of the rowers rowing?
- Have them try to set it up. - see if they can figure it out, if they use it in an unexpected way, etc. - VIDEO them (do a time study)
- Do you have any initial impressions or ideas about the prototype?
- What works well about this device?
- What does not work well about this device?
- For transfer project: What type of shells do you use? (so we can find out what they are made of, their strengths, etc.)
klsjaklfkajkfj


